Uploading DICOM Images
Step 1: Log-in to your mymedicalimages account at https://app.mymedicalimages.com/
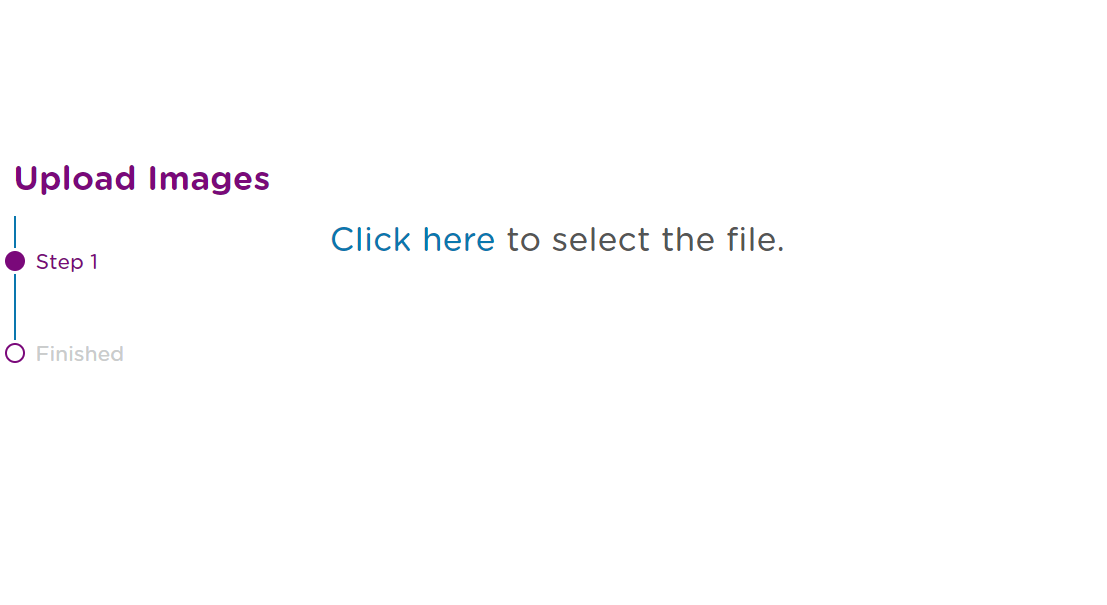
Step 2: In the top right-hand corner of the screen, click on the blue “Upload Images” button.

Step 3: Select the file source.
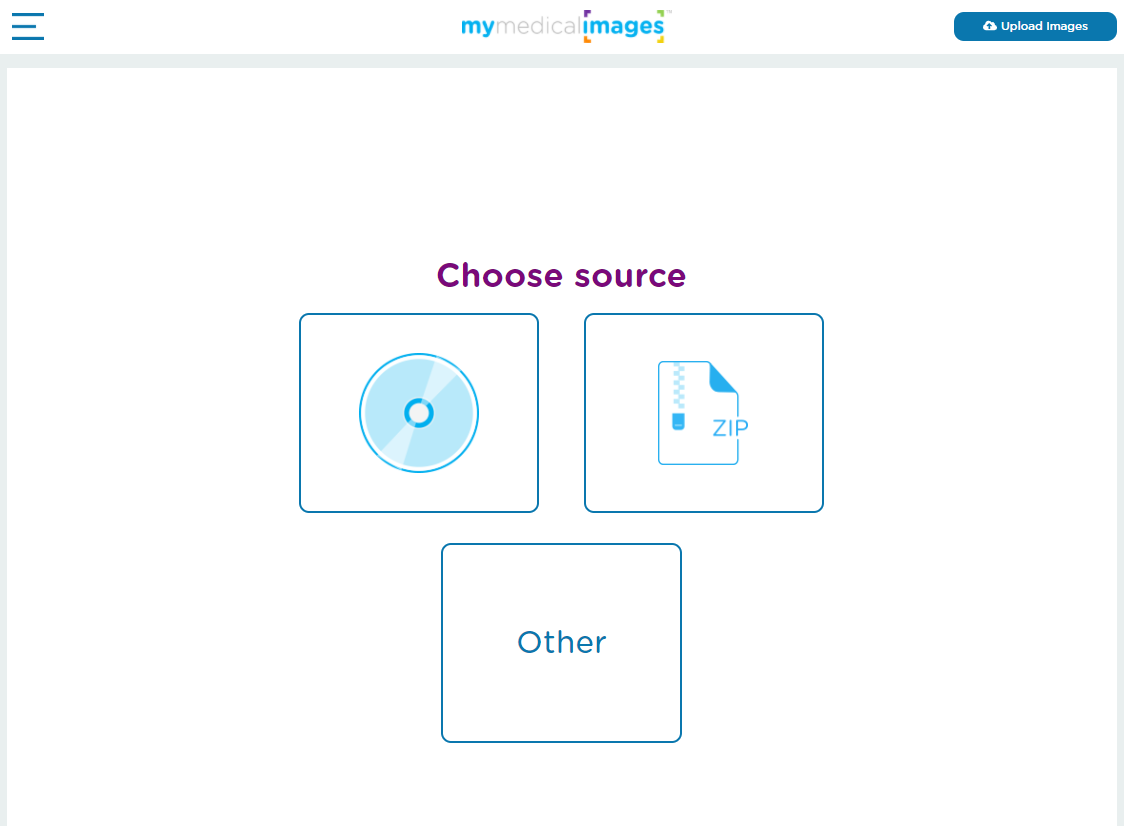
You will have the option to pick between a CD, a .zip file, or “other”. If the images you are attempting to upload are not on a CD or contained in a .zip file, you will need to select the “other” option.
The following steps you need to take will change depending on what source type you choose.
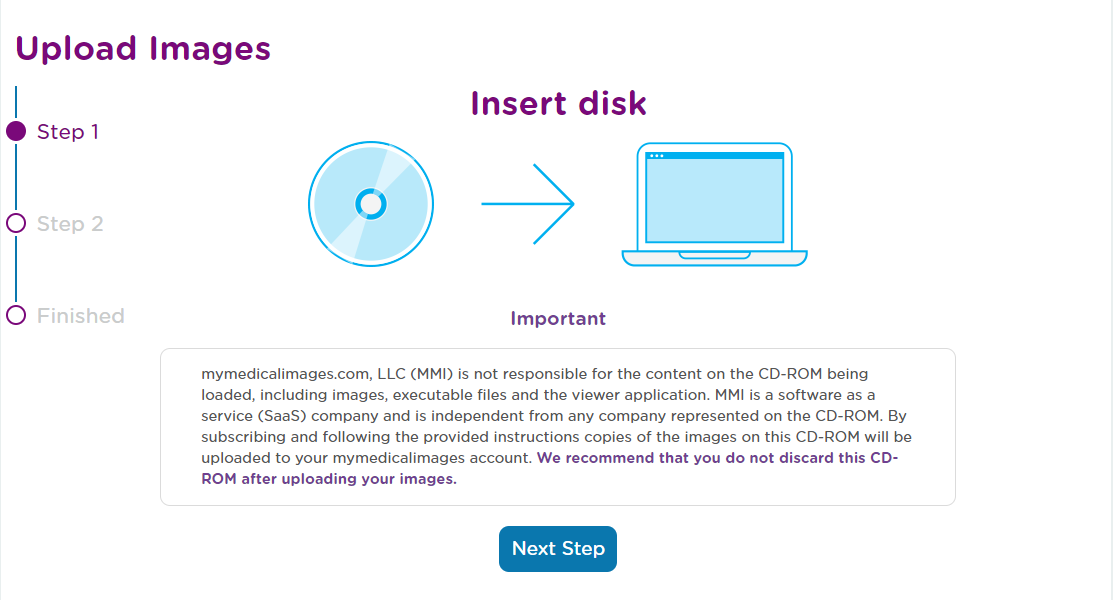
For CD:
1. Insert the disk and click on the next button.
2. Click on the “Click Here” button to open the file explorer window.
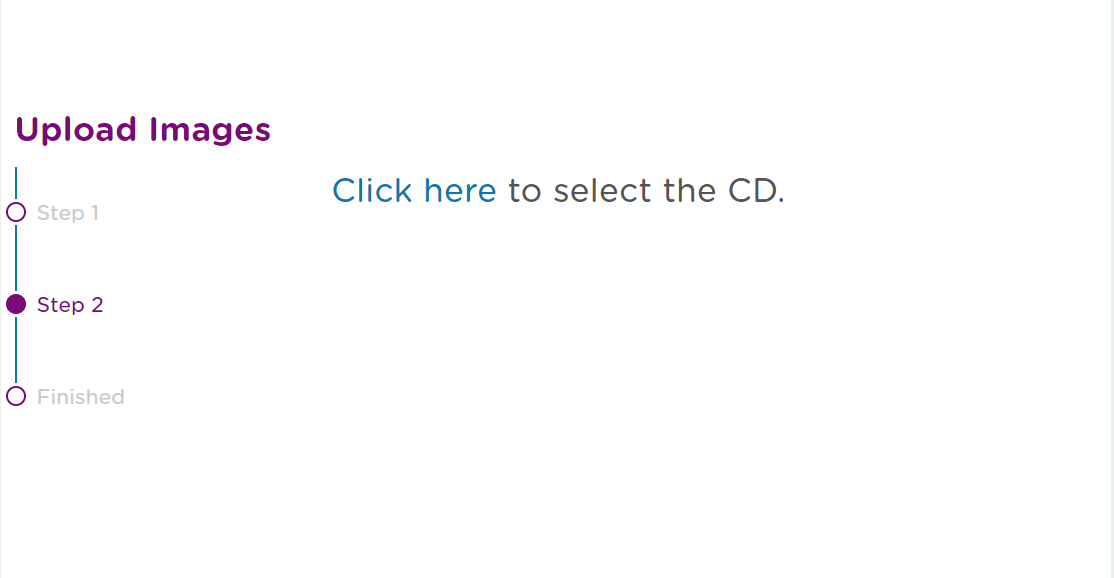
3. Select your computer’s CD Drive then click “Upload” in the bottom corner of the pop-up window.
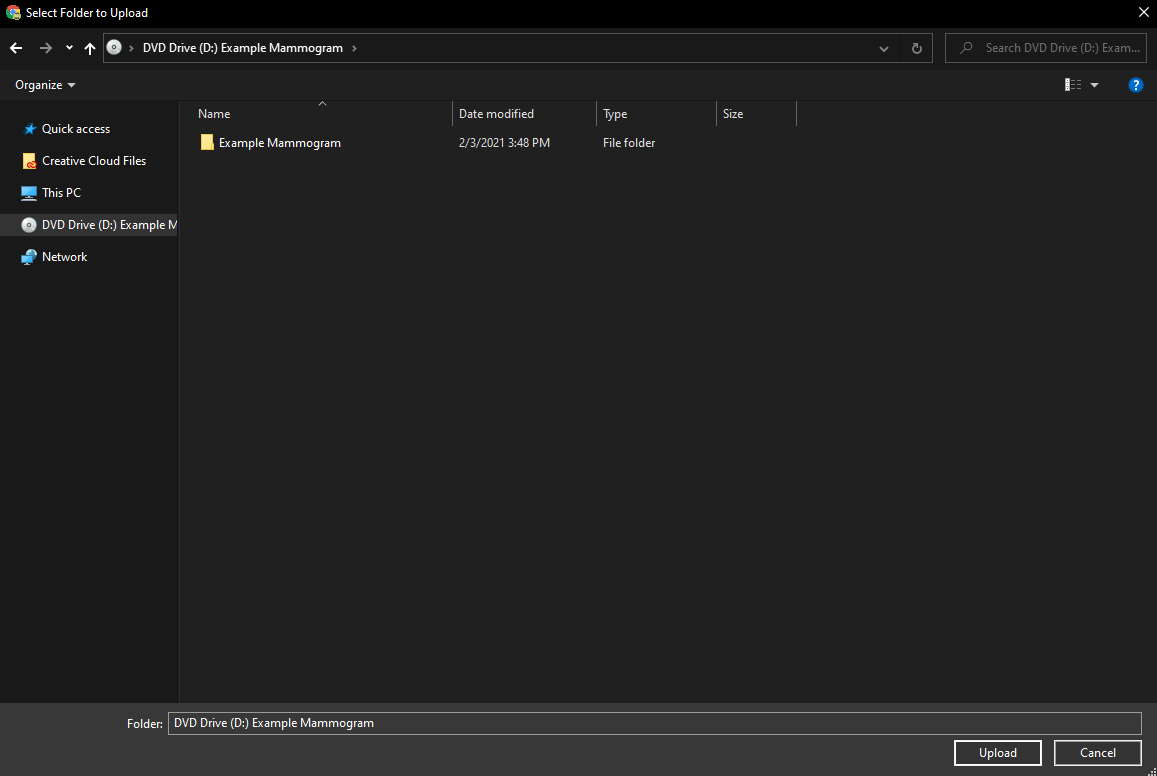
4. Proceed to Step 5.
For .zip:
1. Click on the “Click here” button to open the file explorer window.

2. Navigate to the .zip file you wish to upload and select it. Then choose “Open” in the bottom right corner.
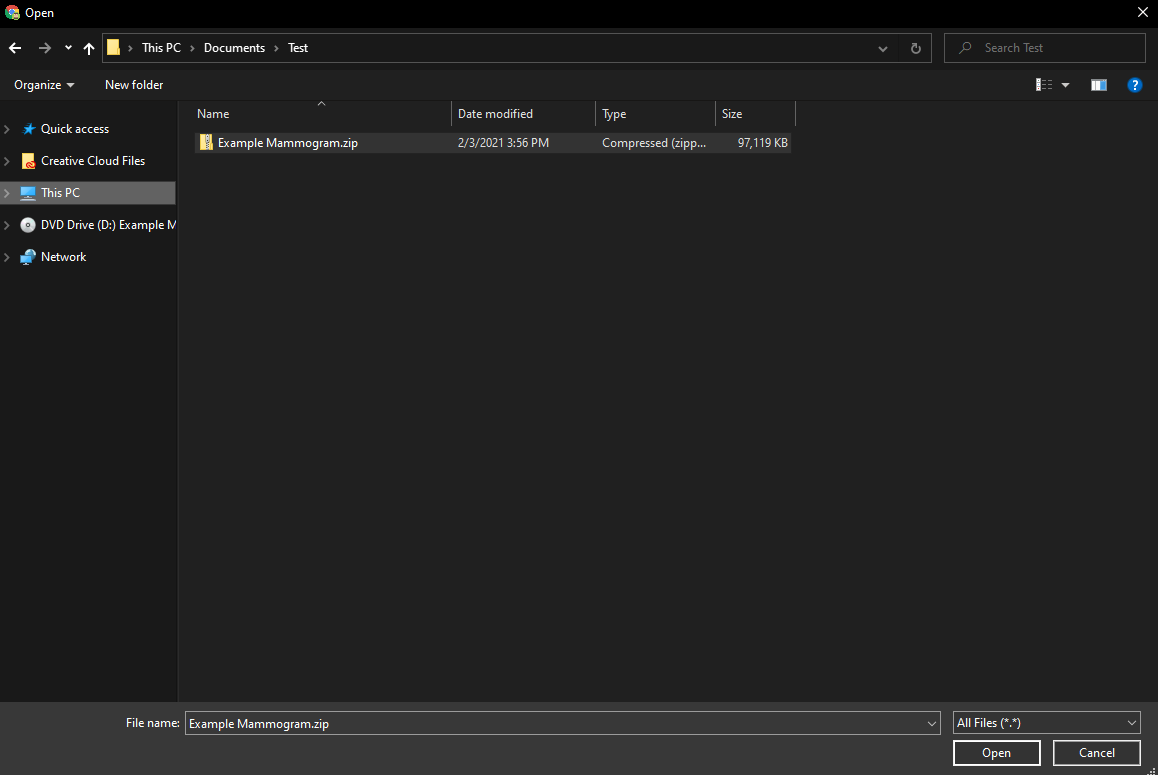
3. Proceed to Step 5.
For Other:
1. Click on the “Click here” button to open the file explorer window.
2. Navigate to the file you wish to upload and select it. Then choose “Upload” in the bottom right corner.
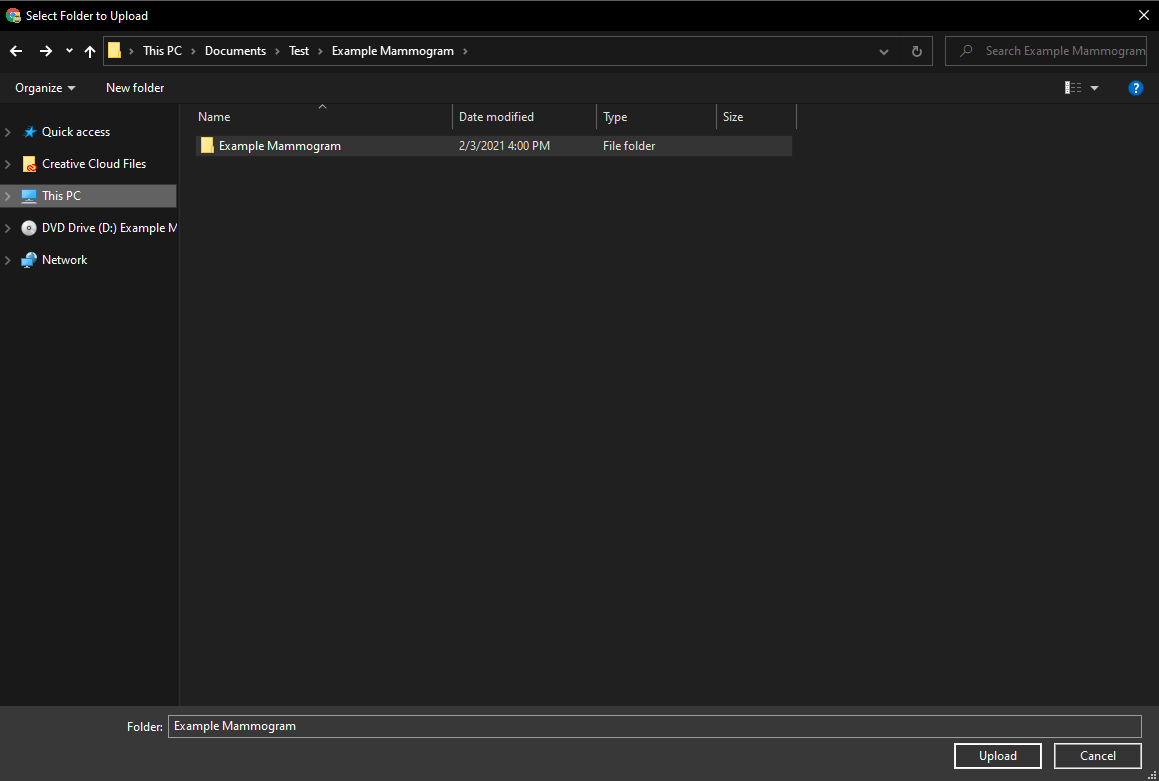
3. Proceed to Step 5.
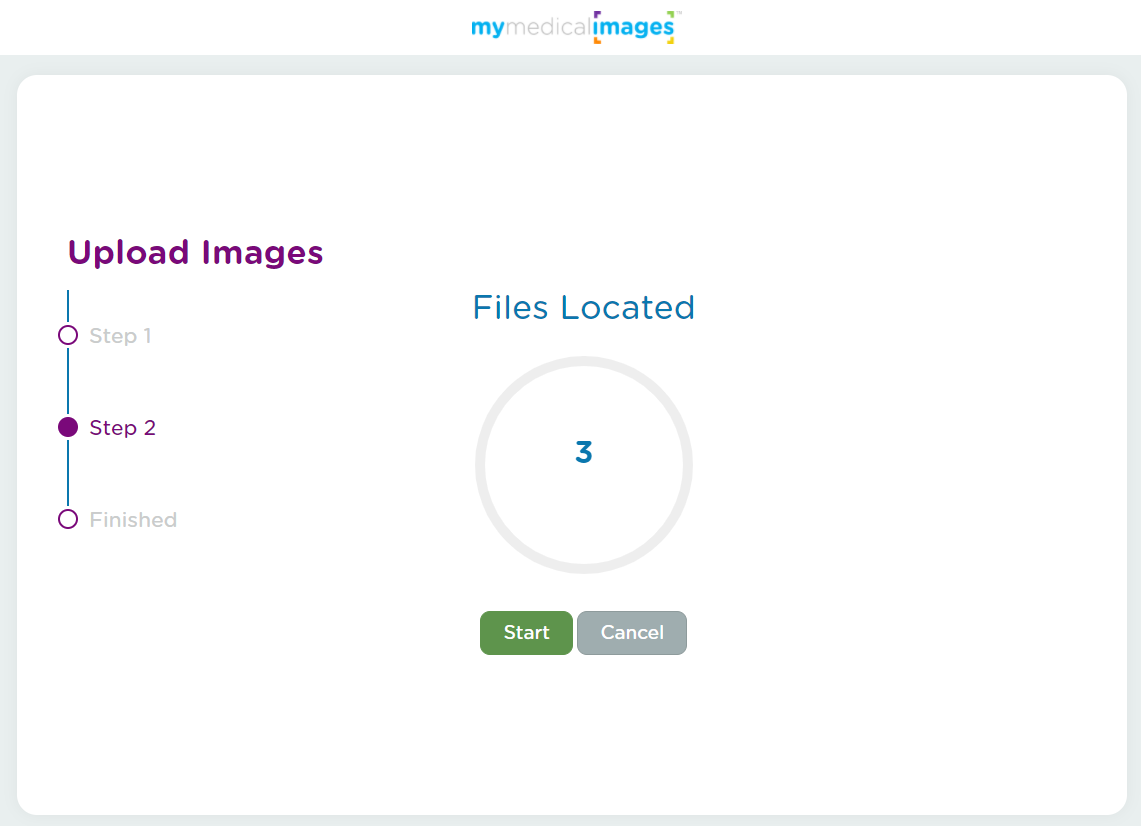
Step 5: You will be taken to the upload page. This page will display the amount of studies that are about to be uploaded inside of the progress bar in the center of the screen. Click on the green “Start” button to begin uploading your images.
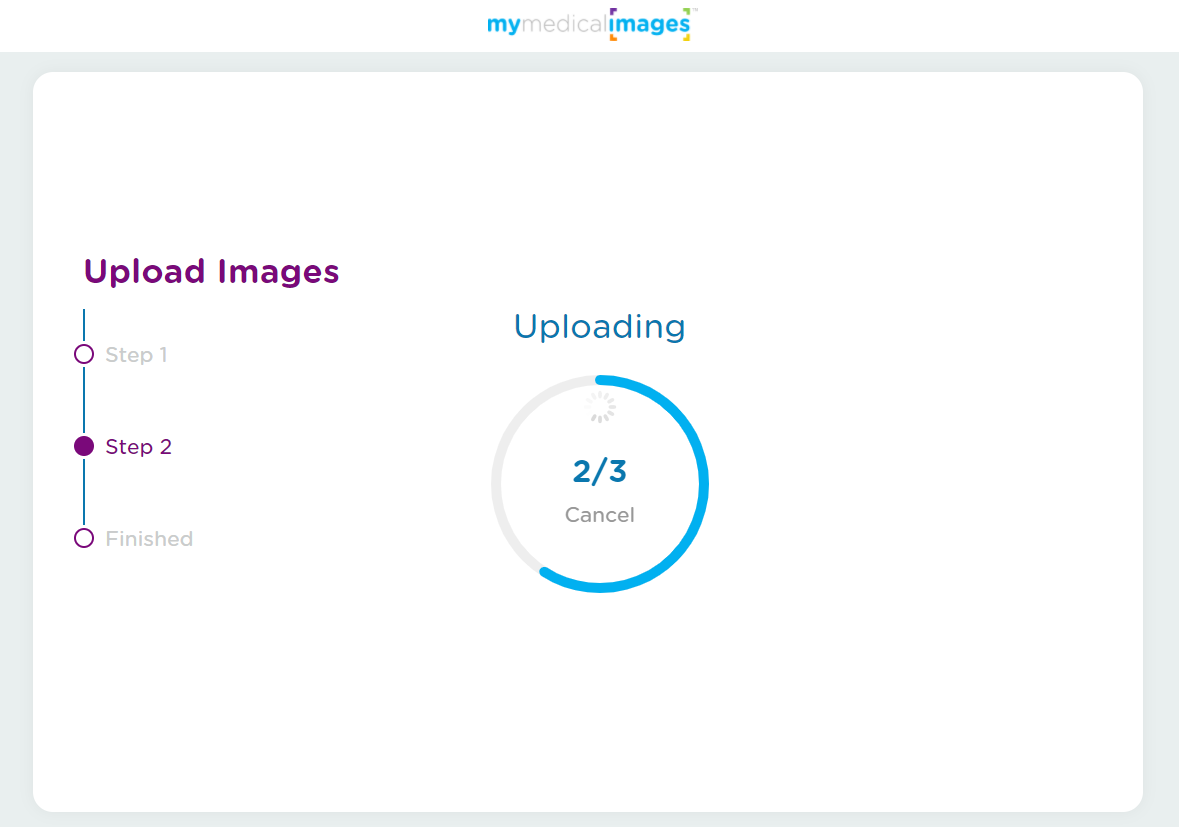
Once the upload begins, the progress bar will begin to fill as the files are uploaded to mymedicalimages.com.
Depending on the amount of files being uploaded, this may take a while to complete. Please make sure that you leave the page open and remain connected to the internet for the entire duration of the upload, or you may encounter issues, such as corrupted files.
Once the upload is complete, you will be given a brief done message before being redirected to the dashboard.

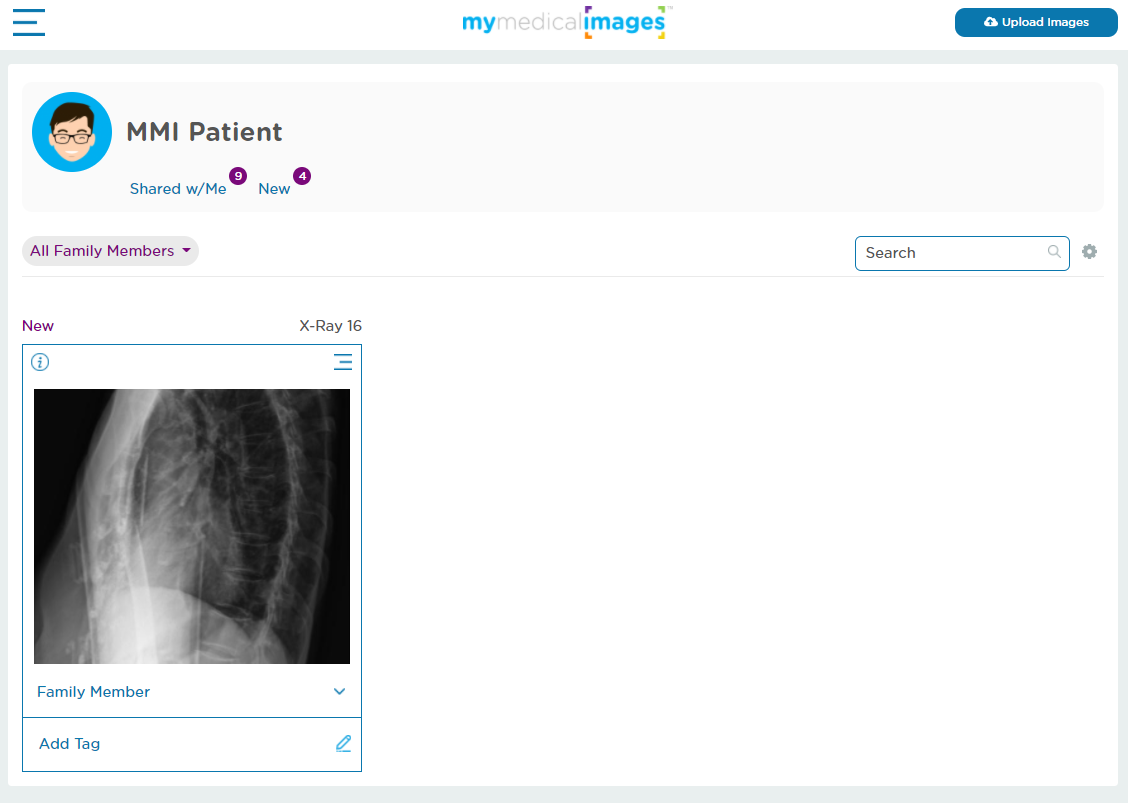
Your images will populate on the dashboard and be marked as “new” until they are opened for viewing for the first time.